Training Concept: The Four Stages Of Luring
In this post, I’m going to discuss in great depth the four stages of luring, a common training technique to get your dog to do a specific behavior such as sitting, lying down, or rolling over.
Luring is extremely easy and will work with any dog that is food motivated. You place a piece of food inside your hand and position it next to your dog’s nose. Because your dog will want the food, it will begin to sniff your hand. While your dog is interested in the food, you can move your hand in different positions to prompt your dog to get into a certain position.
For example, you can move your hand upward and toward your dog’s ears to get it to sit or move your hand down and toward its paws to get your dog to lie down. It’s a useful technique available to anyone wanting to train a dog by using positive reinforcements.
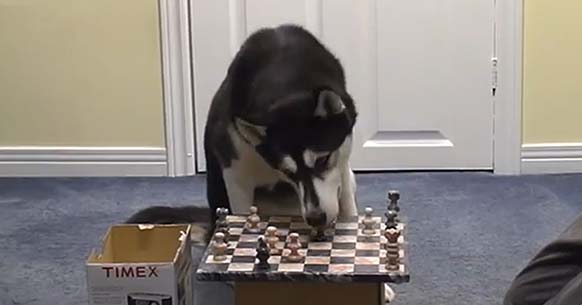
However, it does have its limits. You cannot use luring to counter-condition an existing behavior such as barking or pulling on the leash. And you cannot use it to teach your dog an intricate behavior such as playing chess or retrieving a ball.
Luring is the first technique I learned to train my dog with. I learned it while attending dog training classes here locally. And I will never forget the moment when I was finally able to communicate what I wanted to my dog. So that my dog learned to instantly respond to my “sit,” “down,” “stand,” and “get in” commands.
In fact, here is a short video of those four behaviors taught using this technique:
THE DIAGRAM:
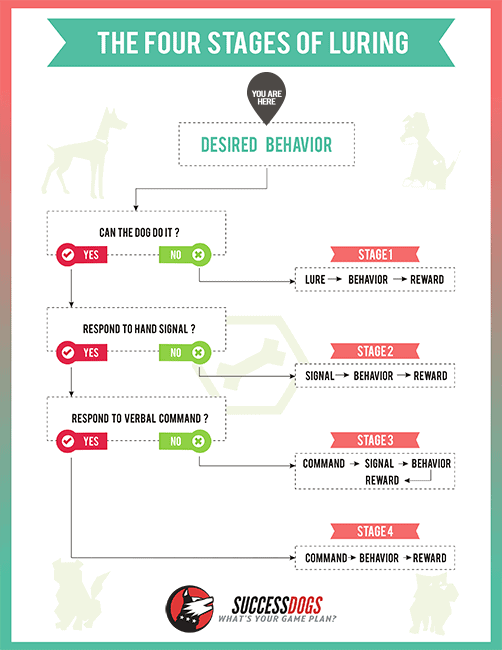
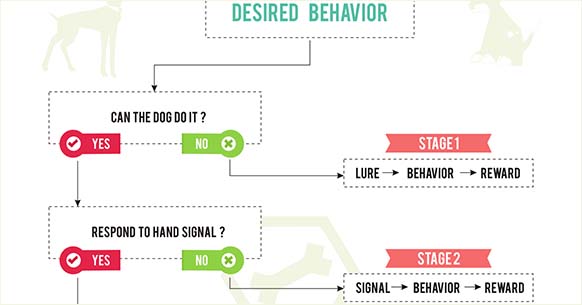
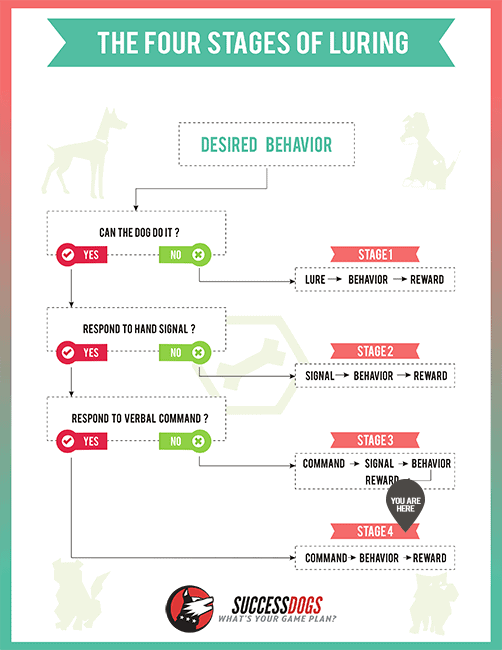
I created this diagram to help you understand more clearly luring process and how you can get to the point where your dog responds to your verbal commands.
The first step, as indicated by the “YOU ARE HERE” marker in the image above, is the behavior you want your dog to do.
Whenever you use this diagram, you must think about one specific behavior you want to train. This is what I call the “desired behavior.” Then you go through the questions on the left, and if any of the answers is “no,” then this is the stage you need to work on.
I will explain each stage in detail below.
STAGE 1:
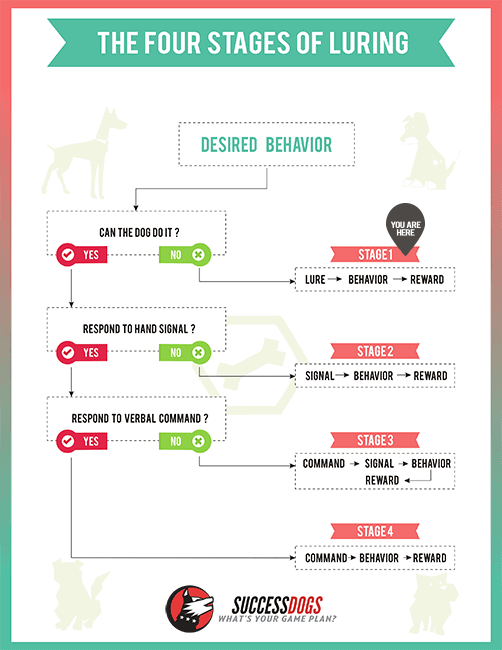
Once you’ve figured out exactly which behavior you want to work on, then you must ask yourself the first question: “Can the dog do it?” This question is in relation to your ability to lure the dog into that position. For example, if your desired behavior is getting your dog to sit, well, every dog is able to sit at some point. But can your dog do it in relation to the lure? The question really should be, “Am I able to consistently lure my dog into this position?” but it didn’t fit inside the diagram.
So if the answer is “no,” then this is where you need to begin.
You will need to pick a food that your dog absolutely loves, something that it only gets as a treat, like a piece of chicken or sausage. Then place this food inside the palm of your hand and close your hand like a fist. Your dog will be able to smell the treat but won’t be able to eat it.
And the way this stage works is this: You move your hand while your dog is sniffing it. This is essentially what luring is. Because your dog is trying to get to the food, it will follow your hand. Your goal here is to move your hand in a way that gets your dog in a particular position.
So, for example, if you wanted to get your dog to sit, you would move your hand upward and toward your dog’s ears.
Now, the secret for this to work with your dog is all about when you release the treat. This is what is going to communicate to your dog: Whatever behavior you just did is what earned you this treat.
So to reward the sit, you would immediately open your hand and give your dog the treat after its behind touches the ground. And when you do this over and over, your dog will quickly learn that the fastest way to get the treat is to sit down.
There is also the option of giving a marker signal once your dog gets into the desired position. A marker signal can be either the word “yes” or the sound of a clicker. In this stage, a marker signal is not needed because releasing the treat once the dog gets into the desired position is enough for a dog to understand what you want.
STAGE 2:
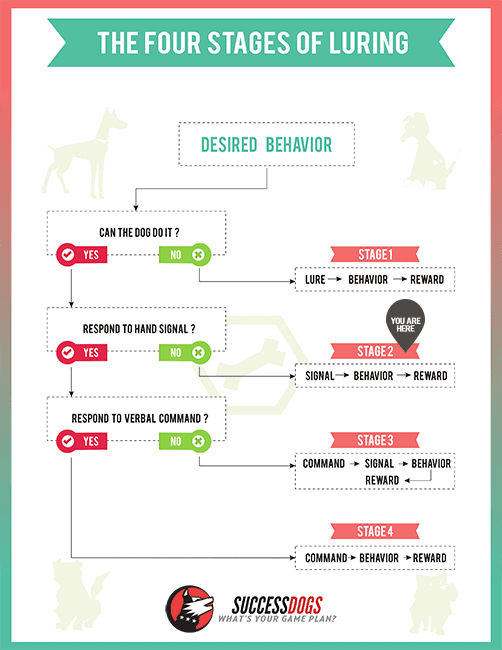
Okay, it’s time for the second stage. This is where you teach your dog to respond to a hand signal. You need to teach your dog a unique hand signal for every specific behavior. For example, sitting is an upward motion with the palm of your hand facing upward.
Teaching your dog a hand signal has numerous benefits, the main one being preventing your dog from becoming dependent on you having a treat in your hand for it to do the behavior. Another reason is that you want your dog to learn your body language so you can communicate at a distance.
I remember when I taught my dog Onyx to respond to all of my hand signals for the obedience behaviors. She would lie down, sit, stand, come, and sit at my side without me ever having to say anything. I thought it was the coolest thing ever.
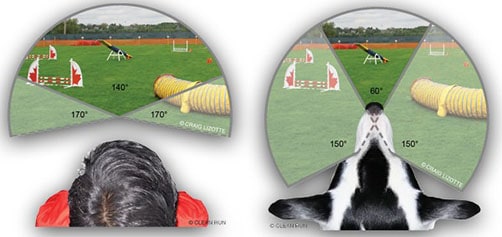
And this is why I love this stage so much: You are effectively communicating with your dog with just the use of your body. Dogs are extremely visual, and they can notice the slightest change in your physiology.
To teach your dog a hand signal, you will have to do it gradually because if your dog is used to following a lure, and all of sudden you use a hand signal, your dog is not going to understand.
That’s why you must first create a pattern so your dog will be successful. This is done by luring your dog three times in a row (the same way as described in stage one). Then, on the fourth repetition, take the food out of your hand and move your hand the same way as a lure.
This works well because you’ve just rewarded your dog three times in a row for getting into the position. And your dog is smart; it will anticipate that you want the behavior repeated. So even though there isn’t any food in your hand, your dog is still going to do the same thing.
This is what is called a 3:1 ratio; you lure your dog three times in a row, each time followed by a hand signal. Then continue practicing until you can lower the ratio to 2:1, then 1:1 and, eventually, you phase out the lures altogether.
What is important to note here is that this is a gradual process; it won’t happen overnight. You need to make sure your dog is successful. If you try to give your dog a hand signal over and over, and the dog fails, you’re both going to become frustrated. That’s why you have to take it one step at a time.
From my years of experience teaching hand signals, I would like to share one more key distinction with you. Whenever you give your dog a hand signal, and it responds by doing the behavior you want, you should always bring your treat to your signal hand before giving it to your dog. This will keep your dog focused and attentive to your signal hand because that is where the treats are.
Once your dog consistently responds to your hand signal and is no longer dependent on the lures, you will want to move on to the next phase, which is to refine your hand signal.
For example, a hand signal in the beginning might look more like a lure with the hand closed and close to the dog’s nose. But then you will want to make refinements to that hand signal and open your palm and face it in a certain direction.
What you want to do is make one small change at a time. Once your dog is successful, continue refining your hand signal. You can continue doing this until you have the perfect hand signal you want. It’s totally up to you.
You will also need to do the same thing with distance. Begin with a hand signal next to your dog’s nose and gradually increase the distance until you are a foot or two away.
STAGE 3:
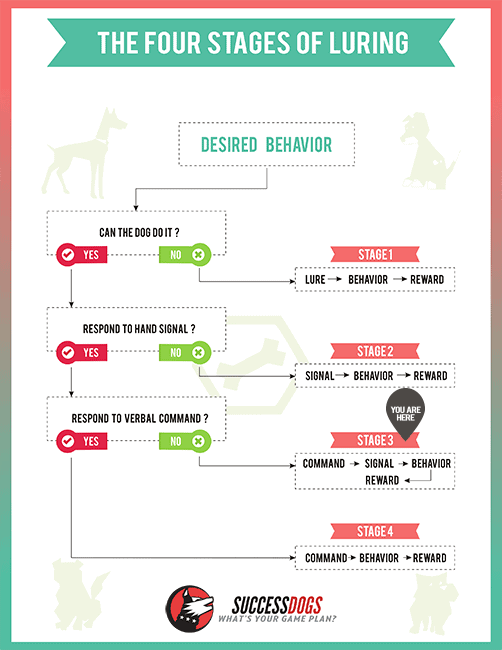
This might surprise you, but did you notice that I didn’t mention anything about a verbal command in the first two stages?
The reason is that dogs have no idea what a verbal command means until it’s been associated with a certain behavior. In fact, dogs don’t understand the commands “Sit” or “Down.” You could train your dog to sit when you say “Banana” if you wanted to. The word itself is meaningless.
The way dogs learn a verbal command is through repetitions in which the dog learns to offer a specific behavior after hearing the command in order to get the reward. It’s that simple.
And I have some great news. Most of the hard work is done in the first two stages in which you teach the dog the behavior and the hand signal. Once you can consistently and easily signal your dog into a position, then all you have to do is say your verbal command just before giving your hand signal.
Here is an example: In stage two, you would begin by giving your dog the signal for sitting. Then your dog would sit. And then you would give it a treat.
Now all you have to do is say “Sit.” Then give your hand signal and, once your dog sits, you give it a treat. Your dog will learn through repetition that every single time you give your verbal command, the same hand signal is given afterward. Eventually, your dog is going to start doing the behavior before you even have a chance to give your hand signal.
Simple, right?
There are a few important details that I would like to bring to your attention. First, make sure that you say your verbal command without using any body language. This means that, before you say your verbal command, make sure that you stand tall with your arms and hands at your side.
Most dogs are primarily visual, and they will pick up on any subtle body language, so if you nod your head every time you give the command “Down,” your dog might be responding to the nod rather than the verbal command.
Second, you must always say your verbal command before giving your hand signal. It won’t work if you say it at the same time, and this is a common mistake new trainers make.
Third, and this is a little more advanced, but my guess is you want to master this training method, or you wouldn’t have read this far. You will want to randomize your repetitions. And what I mean by “randomize” is this: Instead of doing the same thing over and over at the exact same pace, try to increase and decrease the length of time between repetitions.
For example, you could do one repetition, then move around a little bit to distract your dog, then do another repetition. This randomization will keep your dog attentive to the initial trigger, which is your verbal command.
STAGE 4:
The final stage is all about phasing out your hand signal. You can continue working with the hand signal if it’s something you want to use with your dog, but my bet is you want your dog to respond solely to your verbal command.
Before you can begin phasing out the hand signal, it’s important that you’ve practiced the stage three exercise enough times that your dog is starting to perform the behavior before you have a chance to give your hand signal. This is what tells you when your dog is ready.
Do you remember how we created a pattern in stage two when we started with a 3:1 ratio: three lures to one hand signal?
You’re going to use this same principle in this stage to phase out the hand signal. The purpose, if you recall, is to create a pattern so your dog will be successful. If your dog does something three times in a row, the dog will most likely do it a fourth time.
So begin by creating a pattern with a 3:1 ratio. Practice giving your command three times in a row, followed by a hand signal, and then reward your dog for doing the behavior.
But on the fourth repetition, you will want to give your verbal command without giving a hand signal. Then wait: If your dog performs the behavior, make sure you celebrate; give your dog a treat and lots of praise. Your dog has effectively responded to your verbal command.
But this doesn’t always work on the first try. Sometimes you might need to give a slight hint of the hand signal, such as slightly moving your shoulder or arm. But the goal is to get your dog to respond solely to your verbal command. So be sure this doesn’t become a habit.
Once you are successful with a 3:1 ratio, the only thing left is to gradually reduce this ratio to 2:1, 1:1, and eventually phase out the hand signals altogether.
CONCLUSION:
I understand this might seem overwhelming, especially if you’re just starting out. It’s like learning how to drive a car. If you remember, it was hard, and you had to pay attention to so many things, but now you can do it without even thinking about it.
The same is true with this training method. Once you’ve gone through all four stages with your dog, you’ll say to yourself, “Ah, that was easy!” And it is, but you have to start somewhere.
So choose a behavior you’d like to teach your dog—something simple such as sitting. Begin with stage one, and work your way from there. If you would like to see specific examples, such as how to lure your dog into a sit position or what my hand signal looks like, you are welcome to get my Good Dog Every Day Program that demonstrates how I work with my own dog.
I look forward to hearing about your success with this training method.

