The Ultimate List Of Dog Trick Ideas
Welcome to the Ultimate List of Dog Trick Ideas! On this page you will find a list of 100 dog tricks you can teach your dog. They are here to inspire you, motivate you and get you to spend time with your dog training and ultimately creating a closer bond with your dog. Enjoy!
Sweet and Simple Dog Tricks
Perfect tricks to start with when you are beginning to teach your dog new things. Impressive to watch yet easy to teach these early sessions will enable you to learn about how your dog thinks and works things out before moving onto more complicated training sessions
The idea of this trick is to encourage calm self-control in your dog. By learning that he only gets a reward when he is calm and waits for permission then your dog will be focused to learn.
Visually pleasing to both the trainer and onlookers the wait command makes your dog appear completely obedient and tuned into the wishes of his trainer, this action is useful as a prelude to something more complicated. For a simple trick to teach, the wait command is neat and effective and extremely useful.
Dog trainers love this trick because it teaches a dog to focus and be controlled during training sessions and everyday life.
Free Training Game – Reinforcement Zone 1
Wow! I’ve received such positive feedback from my 3-part series on training dogs to walk in harmony…
But after reading dozens of emails, I realized many people are still struggling with their dog pulling them on the leash.
So I decided to give you a FREE training game…
Inside this training game, you will learn the best strategy to reward your dog for walking nicely with you.
Because most dog owners have the wrong approach. They focus on punishing their dog for pulling instead of rewarding their dog for walking nicely with them.
Which leads to all sorts of problems…
The biggest of them all is it takes the fun away from walking your dog. It leaves you in a negative mindset and scares your dog as he tries to avoid being punished.
So take a moment to watch this training game, and more importantly practice the technique with your dog during your next walk.
You’ll be glad you did.
Click the play above button to watch the video.
YOUR NEXT STEP:
Like this training game? There’s 23 others like this one inside my Walk In Harmony Game Plan. Click here to learn more about it, your dog will be glad you did!
Success Stories: How Our Students Are Training Their Dog To Walk On A Loose Leash (And Stop Pulling On The Leash)
In my first article in this series on training your dog to walk on a loose leash without pulling, I shared my unique four-step training process. In my second article I discussed the five most important reasons you should train your dog to walk on a loose leash.
In this article I will share some of my students’ success stories. You’ll see that it’s possible to transform your dog’s walking behavior, no matter your circumstances. And by the end of the article you’ll be motivated to take action yourself. If others can do it, so can you.
I would like you to meet two dogs, Balto and Makita, belonging to one of my students.
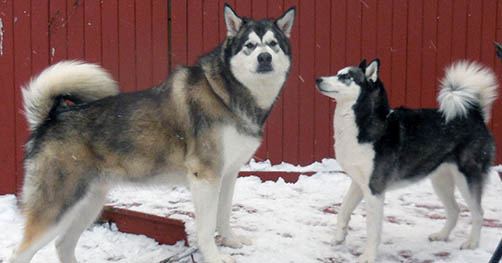
Balto and Makita are large dogs that weigh over one hundred pounds each. Their owner, Luann, was having a difficult time walking them together because they were easily distracted. But with the help of the self-control training games inside my Walk In Harmony Game Plan, Luann was able to teach her dogs to focus on her.
Here is what Luann said after completing my program:
[order_box style=”4″ alignment=”center”]“Because of the Walk in Harmony Game Plan, I can finally walk both of my dogs at the same time and go to parks, beaches and even hiking with them. I have a 3 year old small Siberian Husky and 7 month old 100 pound Alaskan Malamute and they both are natural pullers when walking on a leash. I had to take them on walks separately because of the pulling and being distracted so I only took them one at a time up and down my block. After using this program on both dogs I can now take them on walks together and go to parks and beaches, hiking and anywhere I want.
This program is a fun-filled positive, motivating, and bonding program for both owner and their dog. The Walk In Harmony Game Plan is user friendly, day by day steps which makes it easy to understand, and very precise easy to follow videos.”
[/order_box]Building your dog’s self-control is vital. It will teach your dog to think twice before running after something like a squirrel or another dog. And the best thing is that you can start building your dog’s self-control in only five minutes and in the comfort of your own home.
For example, my popcorn training game teaches your dog to ignore a pile of popcorn on the ground. Although you’re not likely to see this while walking your dog, the purpose of the training game is to build your dog’s tolerance for distractions by focusing on you instead of the distraction. The game serves as a blueprint you can use to train your dog to overcome any distractions including a dog barking, a squirrel running, or something on the ground.
If you haven’t yet tried my popcorn training game, here is a sample video showing exactly what to do:
Meet another student who has gone through my Walk In Harmony Game Plan: Lisa also struggled because her dog Doodle was easily distracted. But her dog reacted differently than Luann’s. Instead of just pulling on the leash, Lisa’s dog would also become overly excited and bark uncontrollably at the distractions. Lisa found herself in a quandary: How could she get her dog to stop barking?
Like Luann, Lisa also found the self-control training games to be extremely beneficial. Here is what she wrote to me after completing the program:
[order_box style=”4″ alignment=”center”]“My dog is a 9 month old Doodle who was very easily distracted by birds, cats, other dogs and especially squirrels. The walk was a constant struggle because he would zone out at the sight of any of these. He would become extremely excited, pulling and barking and then remain in that state of excitement for the rest of the walk. We had an AHA moment where I understood how to apply the ‘ It your choice’ principal to the beginning of the walk.”
“Some days we don’t walk at all we just practice going back and forth up the driveway working on self-control and paying attention to me. This has greatly improved our walk. He is much better when passing dogs now. He still gets really excited with squirrels but he seems to recover from them a little quicker so that I get his attention back. He is still a work in progress and we have a ways to go yet but I feel more confident now with the tools I learned from Jean’s program. I have always used positive reinforcement when training Doby but the addition of the ‘it’s your choice’ component has made a huge difference.”
[/order_box]If you’re wondering what Lisa means by “It’s Your Choice,” it’s the process of teaching your dog that it has a choice. Instead of punishing your dog for bad behaviors like pulling on the leash or barking, I teach my students to offer their dogs a choice. If their dog makes the right choice, such as paying attention to them, walking next to them, or ignoring distractions, then they reward it.
This is the opposite of what many traditional dog trainers teach. Many dog trainers will have you punish your dog for bad behaviors by either pulling sharply on the leash or using a pain-inflicting device like a choke or prong collar.
There’s none of that in my program. Instead, my program requires you to think creatively and to understand what goes on in your dog’s mind. As you offer your dog choices, your dog will learn to think about what it’s doing, and over time your dog will learn to look for ways to please you, even when you’re not actively asking it to do anything.
That is how I teach my students to train their dogs, and that ultimately leads to the happy, well-behaved family dog they’re proud of.
Now I’d like you to meet Chester, another dog that has gone through my Walk In Harmony Game Plan with her owner Marianne.
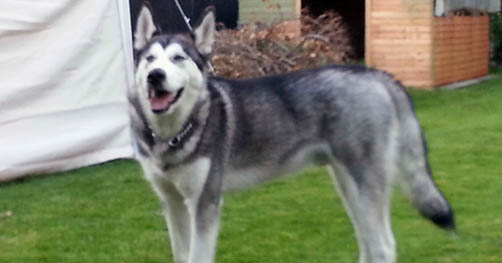
Marianne knows a thing or two about dogs and is very experienced with owning different breeds. But before she enrolled in my program she had trained her dogs using the traditional methods I mentioned above that are focused on punishments instead of rewards.
But Marianne was looking for a better way to train her dog to walk on a loose leash. She wanted her dog to pay attention to her, to walk at the same pace with her, and to respond to her body language.
Here’s an excerpt from a letter she wrote me after going through my Walk In Harmony Game Plan:
[order_box style=”4″ alignment=”center”]“Jean Cote’s Walk In Harmony Game Plan was certainly one of the BEST investments I have paid for – no classes, no fuel costs and no ‘waiting’ around to ‘do my turn’!
Jean Cote has changed my perspective on training and I am much more realistic in my expectations. Having had MANY dogs including Boxers, and bred Westies I thought I had done pretty well. Jean Cote has given me a much faster and patient methodology in training and with my latest (18 months at start of training) Chester – a Husky cross Alaskan Malamute, weighing now 6 stone+, it has been so rewarding for both of us in learning to ‘talk’ and ‘respond’ to each other – particularly as Chester is my ‘soul mate’ and just wants to ‘be’ with me and please me!”
[/order_box]I will be honest and say that her letter left me a little teary-eyed. There’s nothing better than making a difference in my students’ lives and seeing how much their relationships with their dogs blossom as a result of my training methods.
That is why I’m so passionate about this subject. It’s not just about training your dog to walk on a loose leash or to stop pulling. My ultimate goal is to give my students the tools and strategies to train their dogs to do anything they want them to do.
I believe the more time you spend interacting, training, and having fun with your dog, the less likely you are to give up your dog. There’s a crazy statistic from the ASPCA that 3.9 million dogs in the United States are abandoned to shelters every year. And of that number, 30 percent will be euthanized.
That is a staggering statistic, and it’s only for the United States. And so it’s my duty as a professional dog trainer to promote these training methods because I know how much they can improve the quality of life for both owners and their dogs.
I would like to thank you for reading this three-part series, and if you would like to continue your education I would be pleased to welcome you inside my “Walk In Harmony Game Plan.” I’m always excited to meet and greet new students, and I look forward to reading your success story.
Five Good Reasons You Should Train Your Dog to Walk on a Loose Leash
In the first article of this series, I shared my steps for training your dog to walk on a loose leash and stop pulling once and for all.
For some reason, whenever I discuss these training steps with my students, they always want more information. They want more details—almost like they’re looking for that secret piece of the puzzle that will magically transform their pets into perfect walking dogs.
However, the sad truth is that there’s no such thing. Nothing replaces hard work, and if you want a dog that walks on a loose leash, then you will have to take the time to train your dog.
I will admit that most people don’t find this proposition attractive. They think to themselves, You mean I have to train my dog? That’s way too much work!
Yes, that is exactly what I’m asking, but you don’t have to take any extra time out of your day. All you have to do is replace the time you’re already taking to walk your dog and replace it with the time you use to train your dog. Simple, right?
I wish all dog owners did this with their dogs. Unfortunately, even after I’ve laid out my logical case, most people still won’t take the time to train their dogs to walk on a loose leash. It requires effort, dedication, and energy.
So in this article, I’m going to share with you five good reasons you should train your dog to walk on a loose leash (and to stop pulling). These reasons are meant to energize and motivate you to take action and begin training your dog.
Reason 1—The longer you wait, the more your dog will pull on the leash.
It’s no secret that many dog owners will tolerate their dogs’ habit of pulling them. Many think it’s a normal part of owning a dog, whereas others simply don’t know what to do or how to solve the problem.
Either way, the longer a dog gets away with pulling on the leash, the harder it’s going to be to curb this habit, which is caused by self-rewarding behaviors—which is explained in detail in the first article of this series.
This is why training a puppy is so much easier than training a full-grown dog. A puppy has not yet developed the bad habits of walking ahead and pulling on the leash. You can get a puppy to walk nicely beside you in just a few training sessions.
Now, that’s not to say you can’t train an older dog who has been pulling for months or even years. You definitely can do it. However, it will be more challenging because you will need to replace the old habits of walking ahead and pulling with new ones such as walking by your side and paying attention to you.
Reason 2—Pulling is a serious safety issue.
Walking a dog that constantly pulls on the leash is not a pleasant experience, and in some cases, the dog pulls so hard that it causes physical pain in the owner’s hand, wrist, arm, or shoulder.
I recently had a student enroll in my Walk in Harmony Game Plan who had had an incident with her dog and needed surgery on her shoulder. She was walking her dog when, all of a sudden, her dog saw a squirrel and decided to run after it, putting massive strain on her shoulder.
Another student of mine suffered from a broken wrist because her dog was pulling on its leash during a winter snowstorm. She didn’t realize that her dog was pulling her toward an icy patch, and she ended up slipping and having to go to the hospital.
I even had another student tell me a story about when she almost got hit by a car because her dog decided to pull her toward a busy intersection. She was walking a big German shepherd, and had she not dropped to the ground to make her dog carry all of her weight, both she and her dog would have been hit by a car.
Now, these cases might seem extreme, but they are real stories from ordinary dog owners who never took the time to train their dogs to walk on a loose leash. They were just too busy with life, and their dogs’ tendency to pull them wasn’t a big enough problem.
My advice is to not wait until it’s too late before doing something about your dog’s pulling behavior. I know that prevention isn’t easy, but if it can prevent an injury, it’s time well spent, in my opinion.
Reason 3—Pulling on the leash often leads to less exercise.
Did you know that humans will do more to avoid pain than they will do to gain pleasure?
This simple fact is also at play for dog owners training their dogs to walk. For example, if your dog is constantly pulling and dragging you around the block, you will experience physical discomfort from a sore hand, wrist, arm, or shoulder.
On top of that, there’s also the emotional pain of what others will think of you. Often, people will make the assumption that you’re a bad dog owner simply because your dog is pulling you on the leash.
I had a student in my Walk in Harmony Game Plan tell me how her neighbor told her silly things as she walked her dog such as “You should have a sled,” “It’s a good thing you don’t have a big dog,” and “Your dog is sure leading the way!”
Of course, her neighbor was just trying to be funny and didn’t intend for those comments to be hurtful. But sometimes what others say can influence us more than we realize, and we can easily associate physical and emotional pain with walking our dogs, which leads us to unconsciously walk them for shorter distances and less frequently.
Another student of mine presents a perfect case of this. She was so ashamed of what other people thought of her while she walked her dog that she would only walk her dog late at night or early in the morning when it was still dark so that nobody could see her getting dragged down the road.
The overall problem is that dogs need lots of daily exercise to release their excess energy, and if you end up walking your dog for shorter distances and less frequently, it will be getting less exercise. If your dog doesn’t have an outlet for excess energy, it will find another way to get rid of it, even if that means doing destructive things such as barking, digging, and chewing.
My sister had this exact problem with her dog a few years ago. Her dog was constantly chewing shoes and furniture. All of that stopped when she started walking her dog for an hour twice per day—her dog simply wasn’t getting enough exercise.
Reason 4—Be able to go anywhere with your dog.
Wouldn’t it be great if you could go anywhere with your dog? This is why I’m so passionate about loose leash training. I want dog owners to be able to go to the park, attend public events, hike, jog, or even take a trip to their local pet store with their dogs. Why should anyone be restricted to just going around the block?
Not only are longer walks beneficial to your dog’s health and well-being, but they’re also great for getting rid of stress. So many of my students live hectic lives with busy schedules, and they tend to be exhausted when they come home at night. The problem is that walking their dogs becomes a chore rather than a way to relax and be out in nature with their dogs.
That’s why taking the time to train your dog to walk on a loose leash is so important. Once you’ve trained your dog, you can go wherever you want, whenever you want. Walks are no longer stressful situations.
Reason 5—Training transforms your dog into a happier, better-behaved family pet.
When I ask my students why they decided to get dogs, they usually tell me it’s because they thought getting a dog would bring happiness to their lives, that their dogs would cheer them up when they felt alone or sad, or that having a dog would give them a reason to get out of the house. But these reasons somehow get forgotten over time, and the struggles of owning a dog become the main focus.
I’ll admit that it’s important to address any behavioral problems that come up with your dog; however, it’s just as important to remember why you’re doing all of this in the first place. Focusing on the problem doesn’t solve it. Focusing on the solution does.
What will motivate you to seek the solution is the vision of why you wanted to get your dog in the first place: the moments you imagined sharing with your dog and the positive things you thought it would bring to your life. If you can get through the tough times, even when it seems like there’s no hope for you or your dog, your relationship will grow stronger. It’s kind of like a couple getting through a rough time. Maybe it’s someone getting laid off at work or a death in the family. It’s extremely difficult during those times; however, once they’ve passed, the couple can look back on them and smile because those events made them stronger.
The same is true with training your dog to walk on a loose leash. It may seem hopeless right now, but it can be the time when you learn how to properly train your dog by using positive reinforcement. If you take the time to master these training techniques now, you’ll not only get a dog that walks on a loose leash but also one that wants to please you in the future. Because the training methods I share in my Walk in Harmony Game Plan are widely applicable, you can use them to get your dog to do almost anything.
Many of my students continue to train their dogs beyond the scope of the program. They’ll use what they learned to teach their dogs to do tricks and all sorts of other neat stuff.
PART 3:
In the final part on this series on training your dog to walk on a loose leash, I’m going to share some real-life success stories of how my students used my Walk in Harmony Game Plan to get their dogs to walk on a loose leash and how you can do it too. Stay tuned.
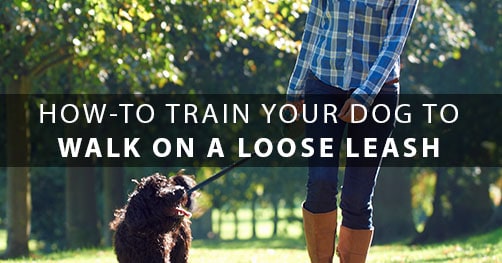
The Ultimate Guide on How to Train Your Dog to Walk on a Loose Leash
Is your dog pulling you on the leash? If so, then you’ve come to the right place. In this training guide, I’m going to share with you four training steps to getting your dog to walk nicely on a loose leash with you and to stop pulling once and for all.
Now, before we dive into the actual training, I’d like you to meet Sophie.
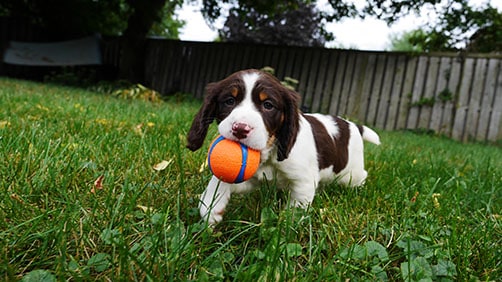
This is a picture of Sophie on the very first day I met her. You see, I met Sophie because my friend was having an extremely difficult time walking her. She would pull on the leash, bite the leash, tug on the leash, lunge at anything that moved, jump up, and bite clothes and shoes.
Does any of this sound familiar?
Although your dog’s pulling behavior might not be as bad as Sophie’s was, I want to share with you exactly what I did to train Sophie. This way, you’ll get a real-life example of how my training methods can be applied and get some insight into how to use them with your own dog.
The sad truth is that there are many ways of training a dog. And though all training methods do work in their own ways, I’m what you could call a gentle soul and have a strong belief that inflicting physical pain on a dog during training is unacceptable.
That is my own personal belief, and it has forced me to think “outside the box,” so to speak, and train using a different method—with positive reinforcements (or force-free, as some would say).
Okay, let’s get started!
TRAINING STEP #1: Eliminate Self-Rewarding Behaviors
Before I give you training advice on what to do, it’s really important that you first understand WHY your dog is pulling on the leash in the first place.
Pulling on the leash is not a natural behavior that your dog is born with. Why would a dog want to strangle himself to the point of gasping for air?
The main reason a dog pulls on the leash is because it’s a reinforced behavior. Yep, in one way or another, your dog is being rewarded for pulling (I’ll explain how below), and most dog owners aren’t even aware of it.
Let me give you an example.
John decides to take his dog to the park for a game of fetch. He knows how much his dog loves this game, plus it’s good for his dog’s health and well-being. So they start walking, and his dog pulls and drags him all the way to the park. They then proceed to play fetch for ten minutes.
This might be a pretty obvious example, but the act of playing fetch (which is something his dog loves more than anything else) will reward any behavior that occurred before, including the pulling.
If you look at it from the dog’s point of view, why wouldn’t he pull? The faster he gets to the park, the faster he will be able to play fetch. And if his owner isn’t aware of what’s happening and how this is rewarding his dog for pulling, the behavior of pulling will get worse over time.
Imagine that this scenario is repeated daily for months. This is how pulling becomes a big problem, and if nothing is done, John will end up with a sore shoulder and wrist and begin to resent walking his dog.
Here’s how you can stop this downward spiral dead in its tracks:
Whenever your dog pulls on the leash, especially if your dog is trying to get to or at something, stop walking and wait for the leash to loosen. An even bigger deterrent is to turn around altogether and walk in the opposite direction.
What does this do? Remember, your dog is pulling to get to something more quickly, and stopping, walking, or turning around creates an incentive to keep the leash loose.
This is exactly what I did with Sophie (which you can see inside my Walk in Harmony Game Plan).
Sophie would pull because she wanted to go to the park and sniff the grass. She would pull when she wanted to meet another dog or stranger or whenever there was an object on the floor she wanted to sniff and investigate.
I had to teach her that pulling would delay the time before she could get to those things. And it worked!
You can do it too. All you have to do is commit to practicing this simple exercise with your dog for the next week or month. Now, before you go ahead and try this exercise, you first have to take into consideration how long your dog has been pulling.
If your dog has been pulling for months or even years, then it’s going to take considerably longer to undo this conditioning. Pulling is like a bad habit, and habits are hard to break. It simply takes time, dedication, and consistency.
TRAINING STEP #2: Reward the Behaviors You Want
The second biggest factor that will influence your dog’s walking behavior is whether you are rewarding your dog for walking nicely with you.
You would be surprised by how many dog owners I’ve worked with who don’t actively do this. And I don’t blame them; our society has programmed us to adopt a punishment mind-set. We are used to looking for ways to punish or suppress bad behaviors.
Here’s a personal example. In one of my relationships, my girlfriend really wanted me to call her every single night. If I missed just one phone call, however, she would become angry with me and let me have it the next time I called her. She wanted me to call more often, but her approach was to punish me for not calling, so when I did call, I received lots of pain.
What do you think ended up happening? You guessed it—the frequency of my phone calls lowered until one day our relationship ended.
Traffic tickets are another example. We all know that speeding is bad and we shouldn’t do it. But let’s be honest—the real reason we don’t speed is because we don’t want to get a speeding ticket. We don’t want the burden of dealing with a police officer and having to pay the fine. And a speeding ticket will usually drive up the cost of car insurance.
Most of us want to avoid the consequences of speeding.
But what if we flipped the psychology, and instead of punishing the “bad” behavior, we rewarded the “good” behaviors?
What if a cop pulled you over and handed you $50 for driving the speed limit? Would you be more or less likely to drive the speed limit in the future? My guess is that you would be more likely to do so.
Of course, this wouldn’t be practical because it would cost a fortune. Luckily, there aren’t any limits on the amount of positive reinforcement you can give your dog. You can easily reach down and give your dog a pat on the back while saying “good dog!” for walking nicely at your side.
And here’s the kicker: the more often you reward your dog, the more your dog will want to walk nicely with you. The behavior will grow over time.
This is exactly how casinos work. A casino never forces anyone to play a slot machine, but if you walk into any casino, you will find someone playing—and most likely losing money.
How do casinos do it?
It’s simple! The casino rewards the player for playing! Everyone who walks into a casino has the dream of walking out rich, of making an extra $10,000 or even $1,000,000. That rarely happens, though. What casinos do instead is give smaller rewards randomly.
Imagine you are on your tenth play and all of a sudden your slot machine starts making noise, the siren goes off, and your machine rack up points for two entire minutes. Everyone around you smiles and congratulates you on your big win. You’re now just a little bit ahead.
And what do you do? You guessed it—you keep on playing in hopes of getting an even bigger prize.
This is exactly how you want to think when training your dog. You want your rewards to build the behavior of walking nicely with you. And it’s extremely simple to do, as I show in my Walk in Harmony Game Plan.
First, you will need to make a list of the behaviors you want to reinforce. These might include walking at your side, looking up at you, stopping when you stop walking, keeping up the same pace as you, ignoring objects on the ground, ignoring other dogs, etc.
Then simply give your dog a reward for engaging in those behaviors. The reward can be anything: saying “good dog” in a cheerful and happy tone of voice, touching and patting your dog, stopping and playing a quick game of tug, or giving your dog a delicious treat.
The key is to give the reward immediately after the behavior so your dog makes the association between his behavior and the reward.
TRAINING STEP #3: Focus on Progress Instead of Perfection
I wish I could tell you that you can get your dog to stop pulling in one afternoon. It would make a great marketing sound bite. The reality, however, is that it’s probably going to take longer than that. It really depends on how long your dog has been pulling.
For example, a dog that has been pulling on the leash for five years has developed a habit that will be harder to break than the habit of a young puppy that is just learning the rules of walking.
But no matter how long your dog has been pulling, you can change the behavior. The key is to focus on progress instead of perfection.
What you want to do is to focus on improving your dog’s current behavior. If your dog can only walk four steps before pulling on the leash, your goal should be to get your dog to take five steps without pulling.
Your goal should be to ask “a little bit more” from your dog each time you go out for a walk.
This is how professional dog trainers train dogs: they focus on the next achievable step. And this is exactly what I did with Sophie. I didn’t show up one day and have one training session, and then she was magically transformed into a Lassie. It took many training sessions with a focus on improving her walking behavior a little bit each day.
In fact, I kept a written journal of every training session I had with her, and I would highly recommend that you do the same.
Here is what it looks like:
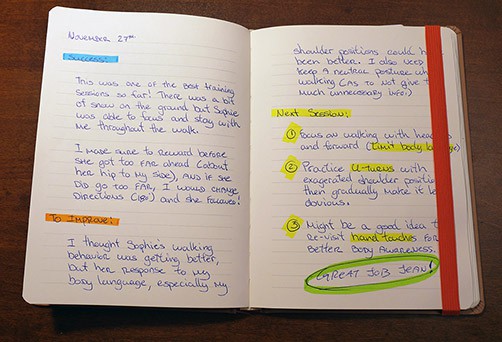
It’s very simple. All you have to do is write three things:
- What went well during the training session (or walk). I’m a firm believer in celebrating successes no matter how small they are. This acknowledgement is also going to give you the emotional juice to keep going.
- What didn’t go well during the training session (or walk). This will be really easy to remember, but I still urge you to write it down. Why? If you write it down, you won’t have to remember it. It’s like Einstein said: “Paper is to write things down that we need to remember. Our brains are used to think.”
- What you need to work on in the next training session (or walk). This is the most important thing to write down, so try to do it immediately after your training session (or walk). Doing so will make your brain think about a solution rather than dwelling on the problem.
And if you are a more advanced trainer, you may even want to videotape your training sessions. That way, you can review the footage and even ask for advice on possible training solutions. For the vast majority of dog owners, though, this isn’t practical or necessary.
All you need is a simple notebook to use as a training journal.
This is why my Walk in Harmony Game Plan is so effective: because I went through this process with Sophie and kept a written record of every one of my training sessions with her. I could open up my training journal right now and tell you exactly what I did during each training session.
TRAINING STEP #4: Play Training Games to Strengthen Skills
Did you know you can improve your dog’s walking behavior without ever leaving the house? Yep, all you have to do is work on teaching your dog the following five skills:
- Attention
- Self-control
- Obedience
- Loose leash manners
- Body awareness
What are these skills?
They are skills that you can teach inside your home where there are no distractions, and then once your dog has mastered them, you can utilize them outside to make walking your dog easier.
For example, you can teach your dog to look up at your face. How useful would this be? Well, next time you are walking past a distraction, you can say “look at me,” and your dog will look at you instead.
Or how about teaching your dog to control his instinct and not lunge or pull toward things on the ground? This is exactly what happens when you strengthen this skill.
So how does it work?
Simple. All you have to do is set aside ten to fifteen minutes a day and teach your dog a particular skill.
I lay out all of my skill-building training games in my Walk in Harmony Game Plan, but here is one I played with Sophie. The objective was to teach her to ignore a pile of popcorn on the ground.
(Click the play button below to watch the video.)
As you can see from the video above, Sophie was quite persistent in the beginning. By the end of the training session, however, she had much better self-control. Imagine if you worked on this every day for a week or a month how much better your dog would be!
PART 2:
In the second article of this series, I’m going to share five reasons why you should train your dog to walk on a loose leash (and to stop pulling) that are incredibly important. As a loving pet parent, you absolutely need to be aware of them. Click here to read part two.
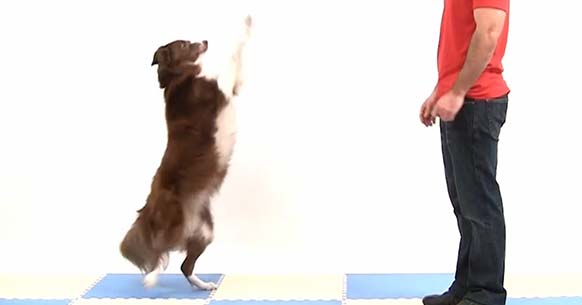
How To Train A Dog To Stand On Its Hind Legs
Not too long ago I was looking at videos of show dogs. You know—those dogs that can do amazing things on talent shows. One trick in particular struck me as simply amazing. I saw a dog stand and walk on his hind legs, and I thought it was the coolest thing ever. So I decided to teach it to my dog. And it worked!
Here’s a video of how I did it, and it’s only four minutes long.
I have added some additional training information and tips below. Be sure to read them when you teach your dog this trick.
STAGE 1
Before you begin training your dog, it is important to note that standing tall on its hind legs is not a natural behavior for your dog. This is not going to be comfortable, especially if you have a larger dog. Smaller dogs usually have a much easier time with this trick.
I must also caution you that if you have any concern about your dog’s hips or hind legs, or if your dog has a history of injury in that area, then you should not attempt to train for this trick. Your dog’s health and well-being is much more important than a trick.
Let’s begin. The first thing is to teach your dog that great things will happen if it stands on its hind legs. That’s why you need to reward your dog when it moves into that position.
Begin by placing your dog in a sitting position, and then place a treat above your dog’s head. Next, you move your hand upward and toward your dog’s back. The goal is to get your dog’s front legs off the ground. As soon as this happens, reward your dog immediately. Continue to reward your dog while gradually moving the treat higher and higher.
The final goal is to get your dog to stand tall on the tip of its toes, as seen in the video. Make sure that your dog doesn’t put its paws on you when doing this trick; your dog should learn to balance itself without your help.
Practice this exercise at least twenty times. Your dog should be comfortable in this position before moving on.
STAGE 2
Once you can easily lure your dog into the stand tall position, the next step is to begin conditioning a hand signal. This step is to avoid having your dog become dependent on you holding a treat above its head to do the trick. You will be able to trigger this behavior from a distance, which looks much more impressive.
The easiest way to do this step is by creating a pattern (e.g., 3:1), which means three lures followed by one hand signal. This works great because it sets your dog up for success. Your dog will anticipate what you want it to do, and it will stand tall even though you don’t have a treat in your hand.
In the beginning, make your hand signals identical to your lure. Basically, this is the same motion as your lure but without any food inside. You can see more clearly what I mean in the video above.
Next, while ensuring that your dog is successful and being rewarded for every repetition, you can slowly make changes to your hand signal. Preferably, move your hand away from your dog and use your index finger pointing up as the hand signal.
The key here is to refine your hand signal to the degree of perfection you want before moving to stage three.
STAGES 3 & 4
Once you can consistently signal your dog to stand tall and you have refined your hand signal to the degree of perfection you want, you can begin conditioning a verbal command. Saying your verbal command just before you give your hand signal easily accomplishes this. However, it is important that you leave a small pause between the two so your dog learns that verbal commands are what trigger the hand signal.
A common mistake new trainers make is that they say their command at the same time they give their hand signal. You really must say “Stand,” and give your hand signal after. Practice this at least twenty times, and then start testing your dog’s understanding of the command.
You can test your dog’s understanding by creating a pattern in which you say your command (e.g., “Stand”) followed by a hand signal three times in a row. Then, on the fourth repetition you simply say “Stand” and see if your dog responds to your verbal command. If your dog responds, then great! Make sure that you celebrate with a treat and lots of praise.
However, if your dog does not respond, this usually means you need more conditioning with hand signals. Also, you might want to record your training sessions to see if you project any subtle body language that your dog might be picking up instead of your verbal command.
For example, a common mistake people make when training their dog to lie down is to say “Down” while nodding their head or looking down. Although this seems harmless, some dogs will learn to ignore the command and simply wait for the head movement. As you can imagine, this is problematic if the owner is not directly in front of the dog.
CONCLUSION
I am so happy you have decided to teach your dog this trick. I think you’re going to love it, especially once you see people’s reaction to it. Although it’s extremely simple to teach, people will think your dog is a genius.
Have fun with it!
NOTE: By the way, I have written an in-depth guide about the four stages of luring. Be sure to read it if you want to apply it to teaching your dog other behaviors and tricks. It’s available here.
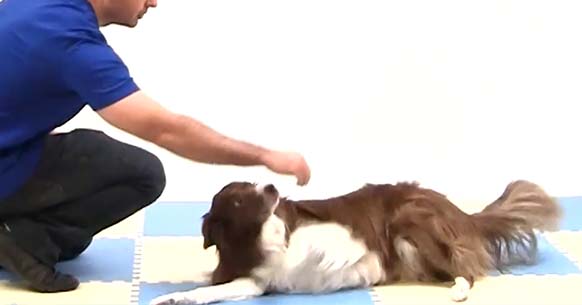
How To Teach Your Dog To Roll Over
Since I published my core training concept, “The Four Stages of Luring,” many people have asked me to show them examples of how luring is done. And because a picture speaks a thousand words, I decided to dig into my collection of dog trick lessons to find one that uses this training method.
Then I stumbled upon my “Roll Over” lesson—the perfect match!
Here’s the video—it’s only about six minutes long and you’ll learn exactly how to teach your dog to roll over.
You will also find some additional information below about each stage so you can refer to it while teaching your dog this trick.
STAGE 1
The first thing you need to do is teach your dog the behavior of rolling over. Begin by luring your dog into a down position. This is accomplished by moving your lure close to the floor and between your dog’s paws. Be sure to release the treat and reward your dog once its belly touches the floor.
Then the next step will be to reward your dog for going onto its side. At this stage you move your lure close to your dog’s shoulder blade. Make sure you release the treat and reward your dog once it falls onto its side.
Continue to move your lure closer to your dog’s back until your dog rolls over. You may need to reward this step multiple times before your dog gets used to the sensation of rolling over. Depending on the size of your dog, you may need to create some momentum by quickly moving your lure toward your dog’s back.
This momentum, as demonstrated in the video, will get your dog’s body to follow through and roll over.
Please keep in mind that rolling over is not a natural behavior for dogs and can be a little bit scary for them. It’s also recommended that you practice this on a soft surface such as carpet or grass. This will make it more comfortable for your dog.
STAGE 2
Once you can easily lure your dog to roll over, the next logical step is to teach your dog to respond to a hand signal. You might be wondering why you need to teach a hand signal. The main reason is to keep your dog from becoming dependent on your having food in your hand to perform the behavior.
Begin by creating a pattern in which you lure your dog twice in a row for rolling over. On the third repetition, simply pretend you have a treat in your hand and do the same motion. This will fool your dog into following your hand even though you don’t have any food in it.
As you become successful at this, you can reduce the ratio of lures to hand signals until it is 1:1, meaning that you lure your dog once and then give a hand signal. Eventually, you will be able to entirely phase out the lures.
Then you can gradually make changes to your hand signal until your dog responds to the one that you want. For example, you can practice signaling your dog to roll over and, with every repetition, you can slowly stand.
STAGE 3 & 4
Did you notice that I didn’t give the command “Roll over” until this stage? The reason I didn’t is that dogs need to learn the behavior before it can be associated with a verbal command.
And because you’ve just taught your dog the behavior in the first two stages, the only thing left is to give your verbal command, “Roll over,” just before you give your hand signal.
Pretty easy, right?
The trick for this to work is repetition. You have to do it a good twenty to thirty times, preferably over a few training sessions. Then you’ll want to attempt Stage 4, which consists of saying your verbal command.
It’s also a good idea to create a pattern in which you give your verbal command “Roll over” two or three times in a row, and then test your dog’s understanding on the following repetition.
CONCLUSION
I must admit I have an affinity for this trick. It was one of the first tricks I taught my dog, and it gave me such a sense of confidence.
So have fun with it!
NOTE: And be sure to refer to this guide while you go through the different stages with your dog. There is also great additional information inside my core training concept, “The Four Stages of Luring.”
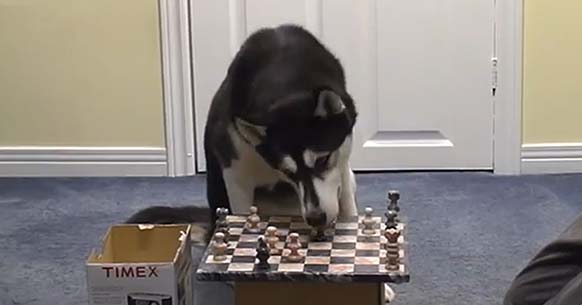
How To Teach A Dog To Play Chess
Have you ever seen a dog in a movie doing something totally amazing, such as playing chess, and thought to yourself, Wow, I wish my dog could do that!?
Well, this is the same reaction that I had when I watched the movie Bingo as a kid. In this movie the dog Bingo plays chess with his owner. While watching it, I thought, How AWESOME would it be if I could teach my dog this trick?
So that’s what I did. And I’m going to share with you exactly how I did it!
(I must write a quick disclaimer here that your dog won’t actually be playing chess with you but rather picking up pawns from the chessboard and putting them in a box beside it. It’s still pretty cool, and if you film it the right way, with a little bit of acting, it can look real! Make sure that you send me that video once you’ve filmed it! :-))
OK, let’s get started! I’m going to share with you the step-by-step training video, and then I will explain each step in detail below.
Introduction
This trick is fairly advanced, so if you’ve never trained your dog to do anything before then this might not be the best one to start with. But it can be something to strive for because any dog can do it, no matter what level of trainer you are now.
This might be obvious, but you will need a chessboard to train your dog to perform this trick. Make sure that the pawns are not made from a toxic material (e.g., lead paint) because your dog will be handling them with his mouth.
You might also want to find a chessboard set that has larger-than-average pieces so that it’s easier for your dog to pick them up. Plus, you have to be very careful and make sure that your dog doesn’t chew or swallow the chess pieces. That would be very dangerous, so be cautious, and always put the chessboard away when you’re not training.
And one last important note: Please keep your training sessions short. Five to ten minutes is perfect. And ideally, three training sessions per day.
Milestones
The overall objective of this lesson is to teach your dog to pick up a pawn from the chessboard and put it in a box beside it.
To ensure that the training is successful, you will have to focus on small steps along the way. I call these steps “milestones” because these are the small obstacles you and your dog must overcome to get the final trick.
The first milestone is getting your dog to pick up the chess piece and put it in the box. This should be done without using the chessboard (as you can see in the video).
The second milestone is all about conditioning your dog to the chessboard and the sound of a chess piece falling onto it. This is VERY important because it will prevent your dog from becoming scared if he drops a chess piece later on (and he will most likely will, as my dog did many times in the beginning).
The third milestone is to combine #1 and #2—in other words, the dog picks the chess piece up off the chessboard and puts it in a small box.
The fourth milestone is adding some extra pieces from which your dog must distinguish the right piece to pick up. You’ll want to add a few more chess pieces and train your dog to pick up ONLY the chess piece that you have chosen.
And the final milestone is mixing up the chessboard, really challenging your dog, and testing how well he understands what you want.
Reminders
Here are a few important tips to remember before starting your sessions:
- Always click your clicker the moment the dog performs the step. A second too late or too soon will reinforce the wrong behavior.
- Always give your dog a treat (or any reinforcement) after you click your clicker—even if the timing of the click is wrong.
- Reinforce each step a few times before moving on to the following one, but try to limit each training session to three steps at a time. In other words, don’t move on too fast.
- Your dog might not follow the plan exactly as I described. You might find your dog doing all sorts of silly things, such as stepping on the chessboard, but it’s up to you to decide what you want to reinforce or ignore.
- Keep your training sessions very short; a five- or ten-minute session is perfect.
- At the end of the training session, store the box away so that your dog cannot play with it.
Milestone #1 – Placing Pawn in Box
The objective is to train your dog to pick up a chess piece and put it in a box (without the chessboard present).
To begin, I recommend that you choose one chess piece and stick with it for the duration of the training. For my dog I chose the black pawn because it was the easiest one for him to pick up because of its rounded head. I would advise against training your dog to pick up the king because if you film your dog performing the trick and playing chess later on, the dog’s move would seem unrealistic and go against the rules of chess because the king can only move one space.
Next, you will need a box for your dog to put the chess piece in. I used an old alarm clock box, so it doesn’t have to be fancy.
Here is the list of steps your dog will need to master to perform the trick:
- Look at chess piece.
2. Bring head closer to chess piece.
3. Sniff or touch chess piece.
4. Open mouth.
5. Bite chess piece.
6. Pick up chess piece with mouth.
7. Move head toward box (with chess piece in mouth).
8. Drop chess piece in box.
Because the dog does not need to move his entire body to perform this trick—only his head to drop the chess piece in the box—you can train your dog to perform this trick while he is lying down in front of you.
The first step will be to train the dog to pick up the chess piece in his mouth. Depending on your dog’s experience with picking things up in his mouth, you may need to spend a few sessions practicing this step before moving on.
Once you have trained your dog to pick up the chess piece, you can then start to incorporate dropping the chess piece into the box.
Tip: After you click your clicker, your dog will automatically let go of the chess piece to eat the treat. You can use this to your advantage by sliding the box below where your dog normally drops the chess piece.
Eventually, you will need to make a change and click ONLY if the chess piece lands inside the box. And once your dog figures that out, you’ll want to gradually move the box away from your dog to make it more challenging.
It is important in training your dog to move along to the next step but not to make it too easy. So you have to GRADUALLY make it harder for your dog, but not so hard that he can’t successfully perform the steps of the training.
For example, when you start moving the box away from your dog, you don’t want to move it an entire foot away; you’ll want to start with an inch. And if the chess piece doesn’t land inside, then wait and let your dog try again.
Note: At the end of all your training sessions, take your chosen chess piece and store it away. It is now a training tool and should only be used during training sessions.
Milestone #2 – Adapting to Sound
Now it’s time to acclimate your dog to the sound of a chess piece falling onto the chessboard.
I have incorporated this exercise into this lesson because I had an incident related to this topic happen with my own dog.
My dog had fully mastered this trick; then one day she accidentally dropped the chess piece on the board, which made a lot of noise and scared the heck out of her. After only this one experience, she was very reluctant to pick up the chess piece.
So it’s much better (and easier) to prevent your dog from becoming reluctant; simply conduct a few training sessions of dropping the chess piece on the board and then clicking your clicker.
Timing is crucial for this to work. Your dog must hear the sound FIRST and then hear the click, followed with a treat. Try to vary how long you have your dog take between dropping the chess piece. Sometimes wait a second before dropping it; sometimes wait five. This way, your dog won’t know exactly when you’re going to drop it.
Milestone #3 – Pick up Pawn From Box
OK, it’s finally time to get your dog to pick up the chess piece from the board and put it in the box.
This should be relatively easy if you’ve fully passed the first two milestones. The first milestone was really the most important, so if you are still unsure about your dog’s ability to pick up a chess piece and put it into a box a foot or two away, then you need to go back and practice some more.
Depending on your dog’s body type and height, you may need to position the chessboard on a small box or a table. As you can see from the video, I put my chessboard on a small box to make it easier for my dog to pick up the chess piece. This also helps prevent your dog from walking on the chessboard.
Once you’ve positioned your chessboard, choose the side that you want the box to be on. This will be the box’s permanent location until your dog has mastered the trick. (You can always change it later on, but for now just pick one side.)
Place one chess piece on the board and reward your dog for picking it up and placing it in the box. If your dog drops it, put it back in the middle of the board.
Tip: You can make it a little easier in the beginning by placing the chess piece closer to the edge of the chessboard where your dog is.
Milestone #4 – Pick up the Right Pawn
OK, let’s make this interesting! Let’s get your dog to start distinguishing between the chess piece that you’ve trained him to put in the box and other pieces that you put on the board.
A good reason why I encouraged you to use the black pawn while training your dog is that it remains easily identifiable when you start adding a whole bunch of white pieces to the chessboard.
So begin by placing one chess piece at the end of the chessboard opposite your dog. For example, put a white rook closer to you and the black pawn closer to your dog. This will make it easy for your dog to pick up the right one. Then you’ll want to gradually move the two pieces closer and closer.
If your dog picks up the wrong one, simply ignore the behavior and wait for him to pick up the right one. Your dog will eventually learn that a reward is ONLY given for picking up the correct piece.
A great advantage is that you’ve been training your dog with the same chess piece throughout the first three milestones, so your dog will have gotten used to the look and smell of it, and it shouldn’t be too hard to him to figure out which one to pick up.
Milestone #5 – Mix the Board
This last milestone is all about having fun with the trick. Challenge your dog (and yourself) by moving the pieces around and only rewarding your dog for picking up the right one.
Your goal should be to have at least five pieces other than the black pawn on the chessboard and to have your dog consistently pick up the right one. But the trick is to mix them up every time after the dog performs the trick.
This will definitely challenge your dog to think.
Final Thoughts
Have fun with this trick! I know that you’re going to have A LOT OF FUN while training your dog to do it, and perhaps you will share a video that shows your dog mastering the trick with me. If you put a link to your YouTube video in the comments below, I want to see it.
And maybe you can build upon this trick. You could train your dog to move the chess piece to a different location on the board to represent a chess move, followed with a BARK to represent “CHECKMATE!” That would be fantastic to see on video!
See you during the next lesson or at one of my dog training programs!
The Collar Grab Training Game
Last week I published three dog training tips to help you train your dog. These training tips are not meant to be full courses but rather “golden nuggets” of information.
One of them was about training your dog to come, and more specifically one technique that I discussed was the “Rocket Launch”. Where you have a friend hold your dog and you call your dog and run in the opposite direction to trigger your dog’s chasing instinct.
You can actually read more about the “Rocket Launch” technique by clicking here.
What I enjoy about publishing these dog training tips is the interaction that I get with other dog owners. I can read about their struggles and help them. And this is what happened; I received some interesting questions about a variety of subjects.
One question in particular was about training a dog to come close and being able to put a lead on.
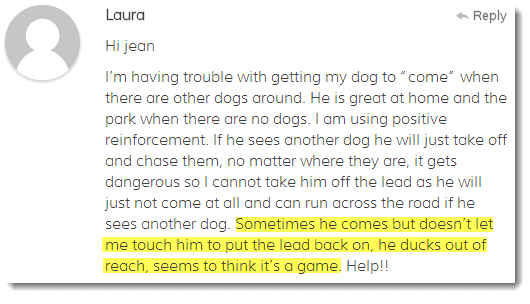
So in response to Laura’s question, and anybody who might have the same issue, I’ve decided to take one of the lessons from my Walk in Harmony Game Plan and share it with you for free.
This training game is called “The Collar Grab Game”. And basically you want to condition your dog that great things will happen when you grab your dog’s collar.
Because here is the thing; most dogs learn over time that coming back to you (or their owner) is something to avoid because it leads to a loss of freedom.
Think of it from your dog’s perspective. If your dog is playing freely in a park, and it’s finally time to go home, what do you do? You call your dog to you, put the leash on your dog and go home.
But over time, your dog will learn this pattern. And you may already be experiencing some side effects of that with your dog starting to “ignore” your come command, or not fully coming all the way to you and staying a few feet away, or running away when you try to put on the leash.
So to counter-act this, you simply have to play “The Collar Grab Game”. Basically you take your dog’s collar, give your dog a treat, and then release the collar. Simple right?
Here is the video:
So when can you use this? You’d want to use this when practicing recalls; get in the habit of grabbing your dog’s collar whenever your dog gets to you. Of course sometimes put the leash on, and other times release your dog.
There’s times when I’m at the park and I purposefully practice this game with my dog. I would call my dog to me and then grab the collar, put the leash on, give her a treat and then let her go back to play.
So have fun! And let me know how it goes by writing a comment below. (Yes, I read them all.)

